Best for moving items across town (requires shipping/receiving).
Go to Products > Transfers > Transfer Orders.
Hit the Plus icon to create a new transfer.
There are 2 types of transfers:
Direct Transfer: Updates instantly (essentially the same as Option A above)
In-Transit Transfer: Requires picking, packing, and shipping the transfer.
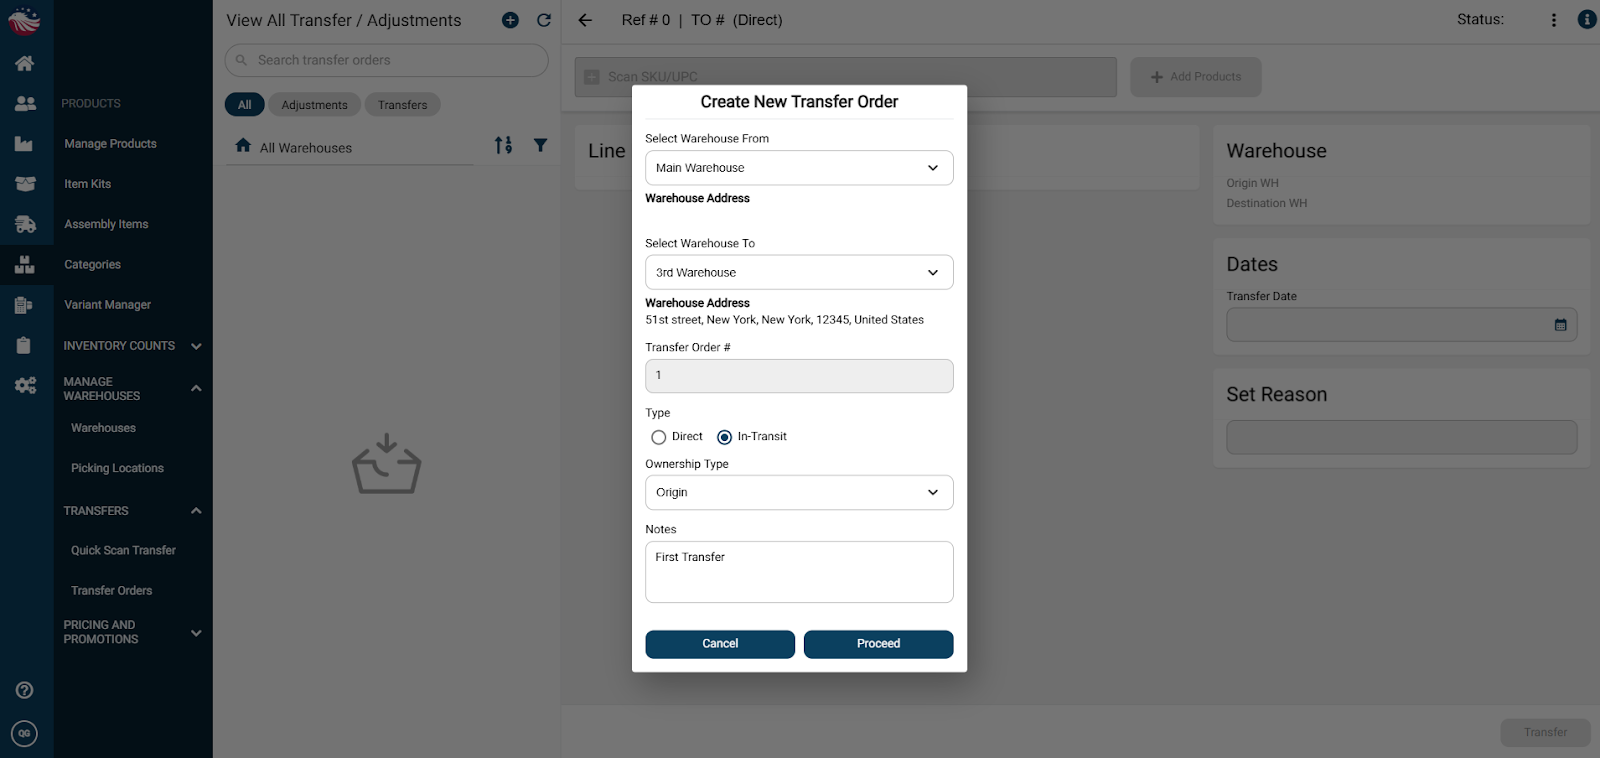
Put in which warehouse the transfer stock is coming from, and which warehouse it’s going to.
Select the Ownership Type.
Bird’s Eye View: When setting up a transfer, you must choose an Ownership Type:
Origin (Standard): The Sending Warehouse owns the stock until it ships. The stock is reserved on the Sender's side.
Destination: The Receiving Warehouse takes ownership immediately. The system reserves the stock on the Receiver's side (as incoming inventory), even before it leaves the building.
Put in any relevant Notes and then hit Proceed.
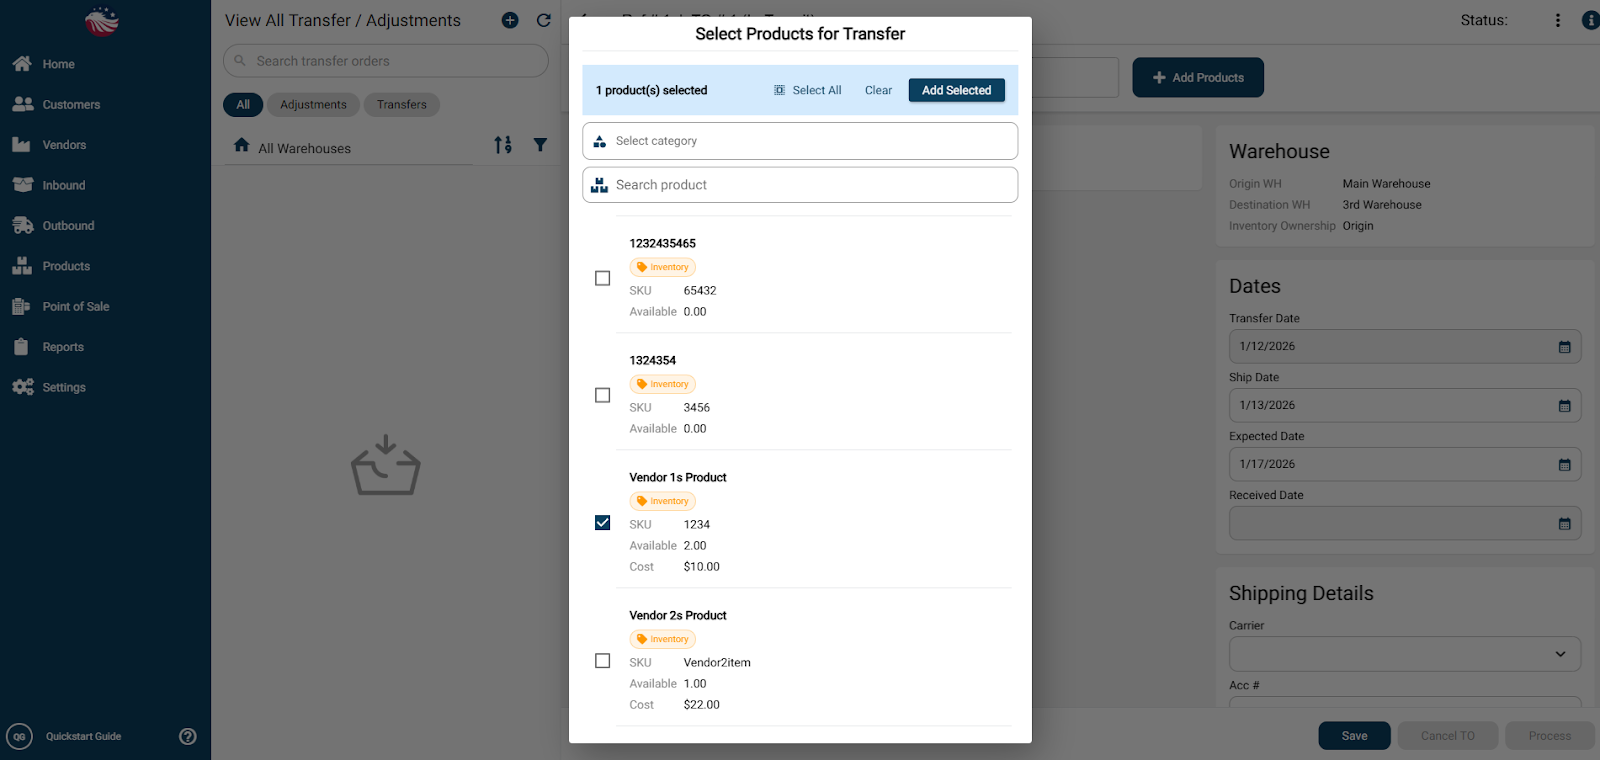
Add products to the transfer either by entering in SKUs, scanning the product, or by hitting the Add Products button and selecting products.
Enter in the quantity to be transferred and a reason for the transfer, then hit Save.
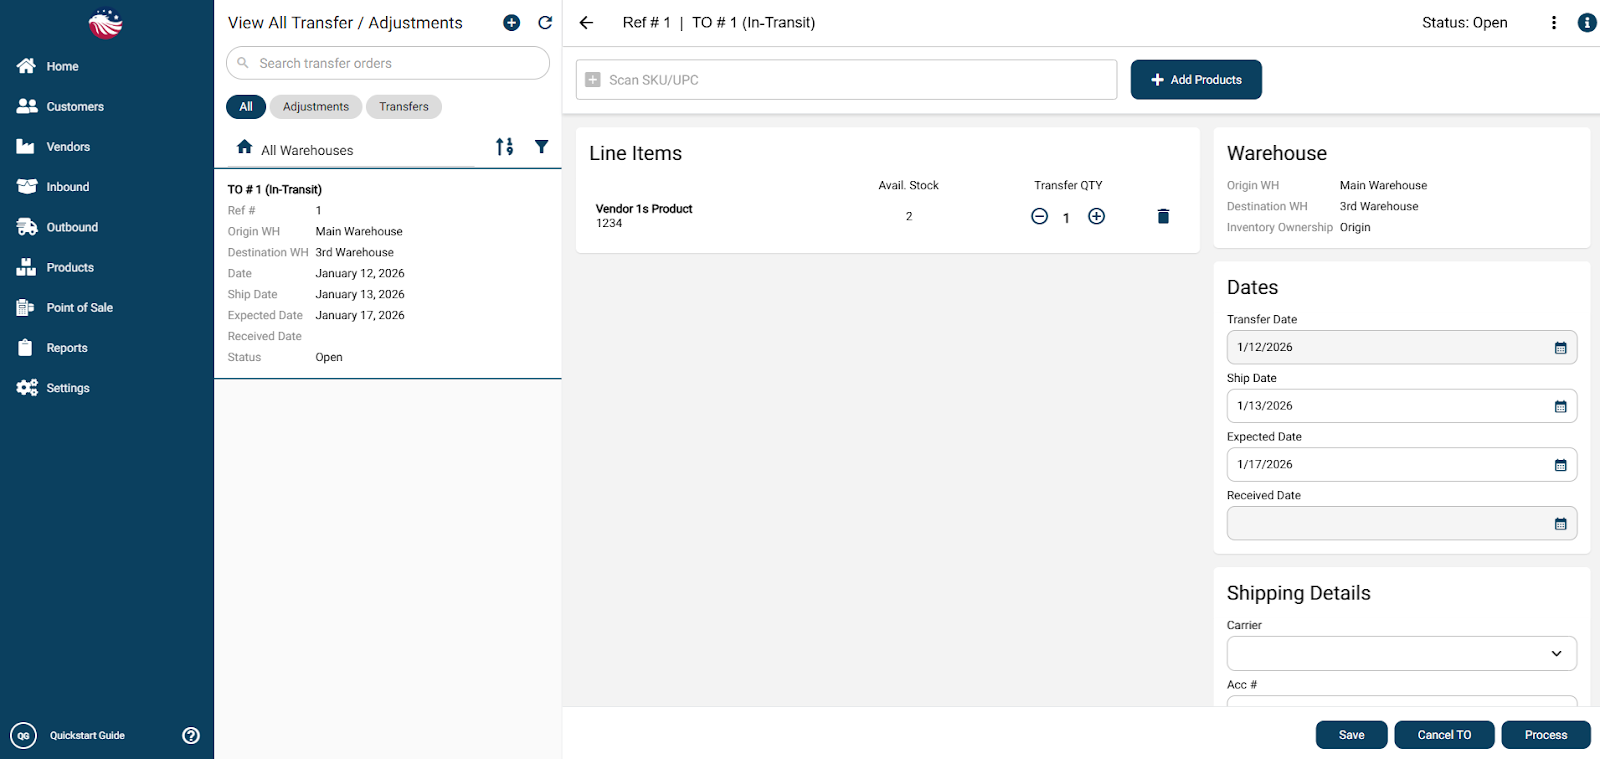
That created the Transfer Order. To make it go through and become an outbound order to be picked hit Process.
Go to Outbound > Transfers and find the transfer.
When you’re ready you can Pick & Ship the order.
Go to Inbound > Transfers and find the transfer, and Receive it.
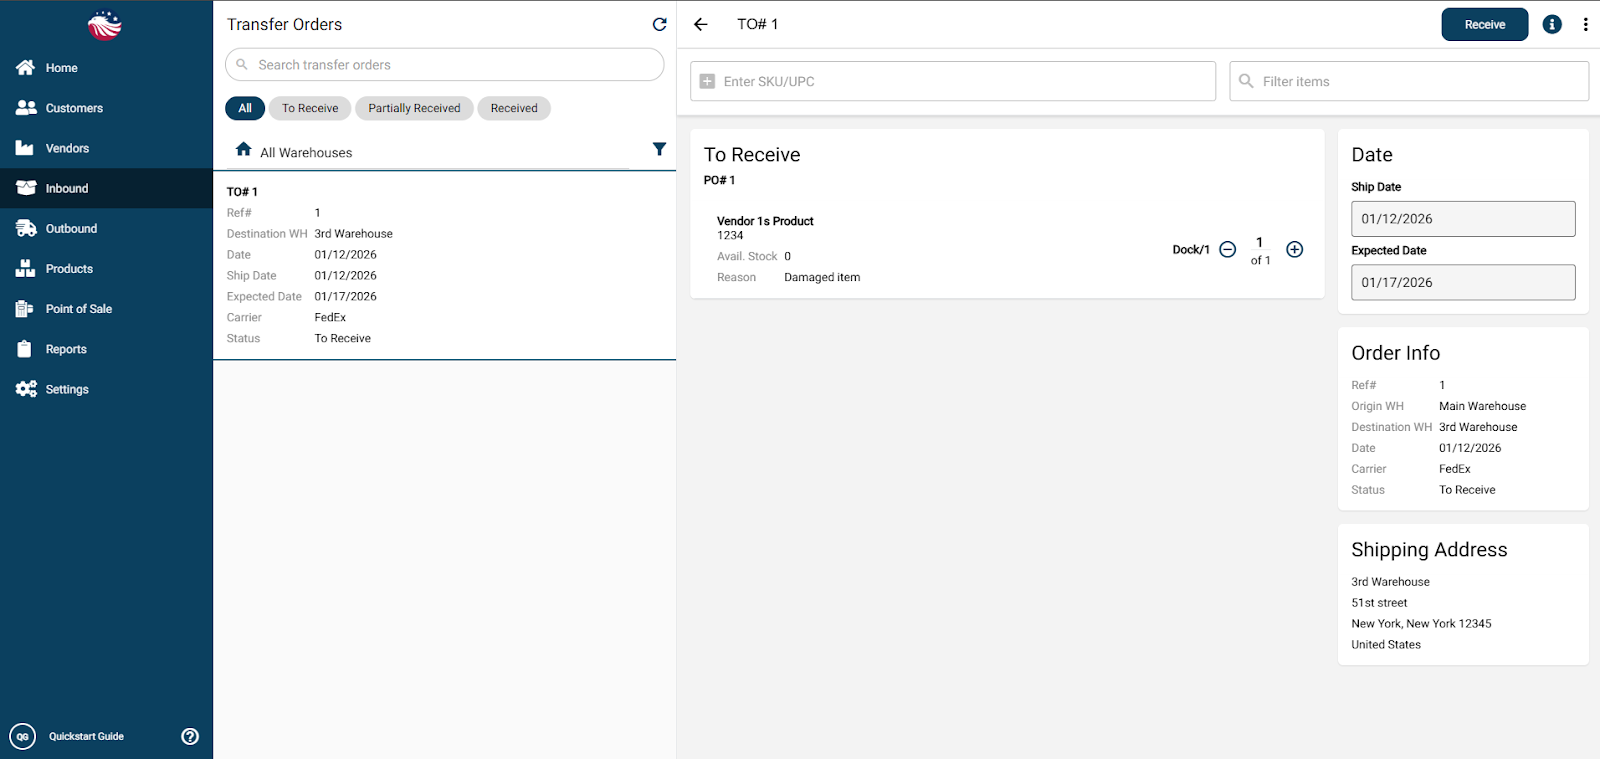
Make sure the product has a location in this warehouse so that it can be received.